
The Ultimate Beginner’s Guide to Static Website Hosting With Google Firebase (for FREE)
I am a total noob when it comes to web development but I am improving my tech skills every day. I have tried to keep this post as simple as I can so that it could help beginners like me. I have taken care of all the steps and codes I mentioned in this blog post, but if you find any errors or would like to suggest something, please feel free to comment. I would be grateful 🙏.
Static sites are fast, secure, flexible, and reliable. You don't need to worry much about malicious code being injected into your site. The hosting cost of static sites are significantly cheaper. I won't go into the details on this topic but here is a great article on static sites by Scotch.
In this blog post, I am going to deploy a static site on Google Firebase, and that too for FREE. The post is a step by step guide, and will be helpful especially for newbies in tech.
Firebase was acquired by Google in 2014. It is built on Google infrastructure, and helps you build high-quality apps quickly, and that too without managing infrastructure. Google Firebase lets you host your static contents for free under its Spark plan. Read more about Firebase hosting.

Prerequisites
As I said, this how-to guide is purely for beginners. Therefore, to host your static site, you only need
- A Google account
- A laptop or desktop with Windows OS running
- Familiarity with basic keyboard functions of your laptop or desktop
That's it. Let's get started.
Step 1: Create a Project in Google Firebase
Register your account with Google Firebase. Create a Google account if you don't have. In the Firebase console, click Add project.

Enter a Project name, Project ID (Optional as Firebase automatically assigns a unique ID to your Firebase project). Use the Default settings for now, and click on Create Project.

Once the Project is created, click on Continue button, and you will be directed to your Firebase Dashboard. You will find a few details here:

- The current project is "thenewspaper-tech-demo". Click on the dropdown to see all your projects, if you have created more than one.
- The current project is set to "thenewspaper-tech-demo"
- You can configure the settings for the current project by clicking on the project settings icon. For now, leave as it is.
- We will use this Hosting tab to deploy our static site.
- Your Firebase plan is Spark which is Free. See all the Firebase Plans and Pricing.
Step 2: Set up the Necessary Tools
To host your site, you need to install Firebase command line tools.
- Download and install Node.js for Mac/Linux/Windows. I am using Windows10 64-bit. Make sure you download the LTS version recommended for most of the users.
- Open Windows PowerShell. To open, press Windows+X buttons simultaneously using your keyboard and then click “Windows PowerShell Admin”. Click Yes when prompted by User Account Control.

- Install Firebase command line tools by running the following command in the PowerShell:
$ npm install -g firebase-tools

This command installs the globally available firebase command. If the above command does not work, then change npm permissions, and run the command again. To make sure you have the latest version of Firebase CLI (command line interface), re-run the above command even if you have installed the command lines tools previously.
Step 3: Build your site Locally with Firebase
In the already opened terminal, run the following command to sign in to Google.
$ firebase loginRunning this command will open your default browser window and ask you to give Gmail access to Firebase. Click on Allow button and connect with your email. If you don't have Gmail account, create one. You might get a pop of Windows Firewall to for access. Just Allow or Click on Yes.
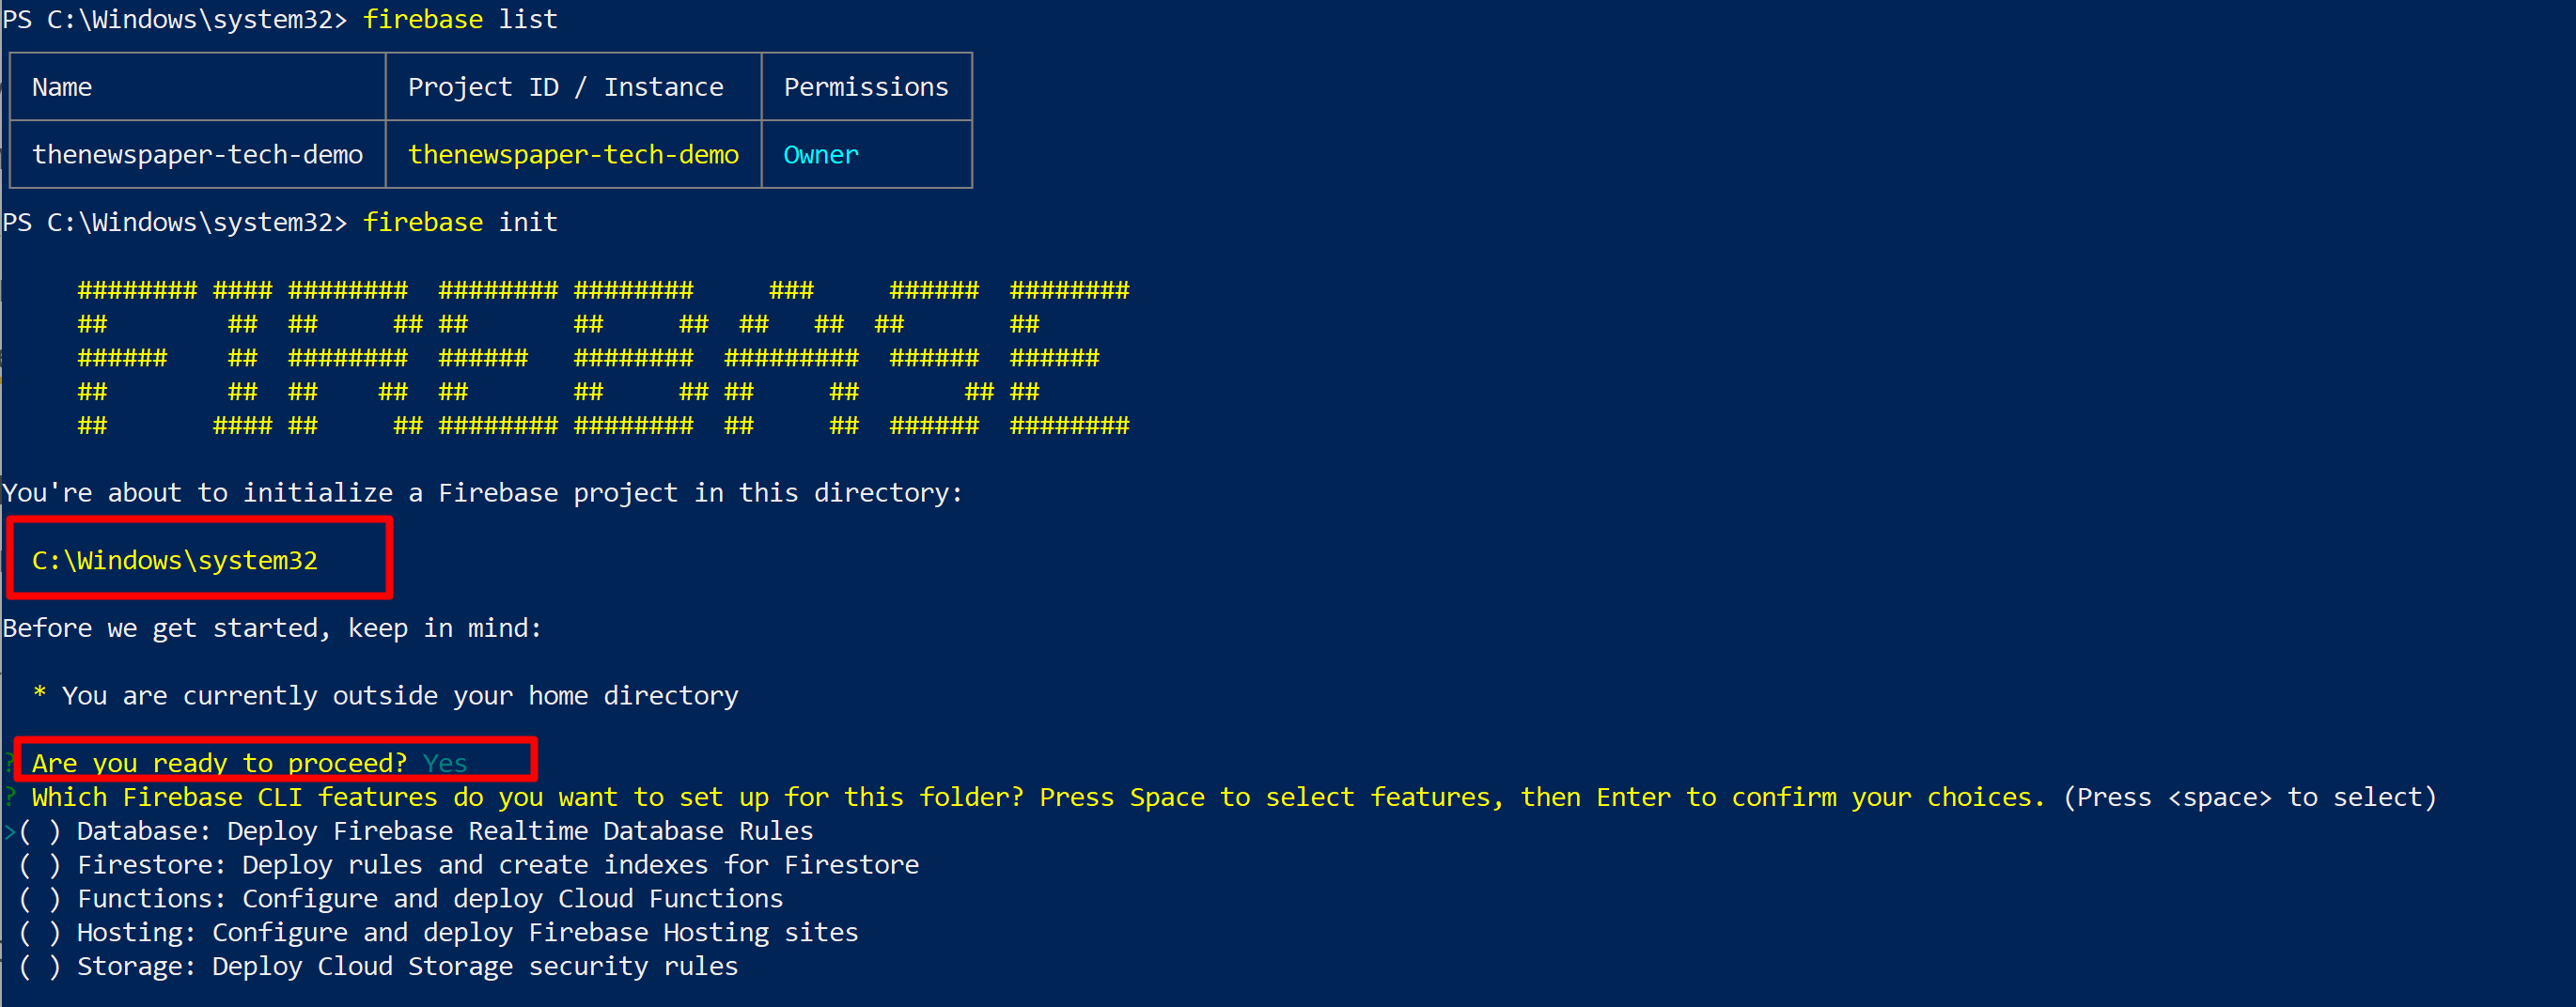
$ firebase list
To connect your local project to your Firebase project, run the following command from the root of your local project directory.
$ firebase init
Once you run the above command, you will see your project directory. The project directory will be located in a folder at this path "C:\Windows\System32". The name of the working folder will be whatever you will name it. By default, Firebase names it as "public". We will see this in a bit. For now, type Y or Yes and press Enter button to proceed with the steps.
The firebase init command presents with you a series of configuration options. You need to choose Hosting. Go down by pressing Down Arrow Key using your keyboard, and then press Space Bar to select Hosting feature. Press Enter button to continue.


Now you will be presented with Project Setup.

Select your project, which you created earlier in Firebase console. The project name I created was "thenewspaper-tech-demo". You can create a new project from here as well.
Moving ahead, you will be presented with Hosting Setup. You will need to choose your project directory. Specify a directory to use as your public root directory. To specify, type public and press Enter. Note that you can enter a different name (such as "my_first_project') instead of "public". At this point, specify your public root directory, but you can also specify it later by editing your firebase.json config file.

To set up more Firebase products, you can run firebase init later. The default for the public root directory is called public which is located here "C:\Windows\System32\public". It is interesting to note that Firebase does a couple of smart things automatically:
- It creates a
publicdirectory if you don't create it - It creates an
index.htmlfile and404.htmlfile in the directory. Open apublicfolder to see both the files
Location of Firebase Public Folder
Next, you will need to choose a configuration for your site.

If you select to make a one-page app, then Firebase automatically adds rewrite configurations for you. Since I don't want to re-write urls, I choose N, and press Enter.
This will complete the Firebase initialization process. Note that the firebse init command adds a couple of files to the root of local site directory:
- A json file,
firebase.json, that shows the project configuration. A
.firebasercfile which provides information on project aliases.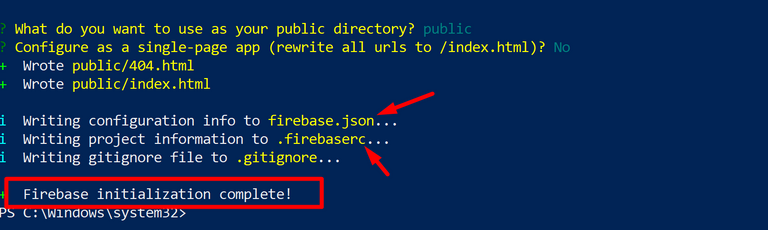
Firebase init command add two files

Now, let's Start the local server for development. Run the following command from the root of your local app directory:
$ firebase serve
This command will serve hosting files from the public directory, and will start a local server.

Open your browser and type: http://localhost:5000

So, you have built your site locally, which contains the content as you see in the above screenshot.
Now, let's change the content of the site and re-built the site to view the updated contents. First, go to Windows PowerShell pop-up that is already opened. Shut down the local server. To do this, click anywhere in the pop-up area, and press CNTRL+C button. It will shut down.

As I had shown earlier, the html files are located here "C:\Windows\System32\public". Go to the folder, copy the index html file and paste the file at your desktop. Now, right click and open the index html file with any Text Editor. I am using Visual Studio Code. By default, you will see Notepad in your right click pop up. If you don't see notepad, choose another app option, and scroll down at the end, and select More apps. From there, select Notepad.

Once the html index file is opened, change the word "Welcome" to "Hello World."

Save the File. Simply press CNTRL+S to save. The output will look like this:

Now, copy the modified index file, and paste in the public folder. To do this, you need to be the Admin of the computer. Give the permission to paste. Run the following command again to start the local server
$ firebase serve
This command will serve hosting files from the public directory, and will start a local server. Open your browser and type: http://localhost:5000 . You will see your changes.

Step 4: Deploy your site
Now we will deploy this project. But first shut down the local server as I instructed before.
To deploy to our Firebase project "thenewspaper-tech-demo", run the following command from your project directory:
$ firebase deploy
This firebase deploy command deploys a release to your Firebase project's default hosting sites:
project-id.web.app
project-id.firebaseapp.com

https://thenewspaper-tech-demo.web.app
https://thenewspaper-tech-demo.firebaseapp.com


You can also see these URLs when you go to Hosting section of your Firebase Console.

Congrats 🎉🎉! You have deployed your first static site with firebase, and that too for free.
Note: You should note that our project is located in C-drive for now. When I was trying to deploy my static files for the first time, I followed the official firebase tutorial. And being a newbie myself, I just went with the flow. But when I tried to initialize a real project in another drive, it never worked for me. If you have the same issue, here is the solution. It says, "When firebase init runs it goes up the directory tree looking for a parent directory that's already initialized as a Firebase project".
- Look for a
firebase.jsonfile at the location/Users/SEB - Delete that file, if it exists
- The issue will be fixed
To avoid all these issue, I suggest you should initialize a project in your desired folder before running any firebase commands. For this, you need to open PowerShell in that folder first. Here is the quick guide to open PowerShell in your desired folder.
Credits:
Cover image built with BlogCover
Comments